How to configure tags by event
Tags by event allows you to customize tag groups on an event-by-event basis, ensuring your team collects the most relevant information for each specific event. You can choose for some tags to be on for all events and others to only be on for certain events.
This feature enables you to define which tag groups are visible to your reps when they scan leads at different events. For example:
- At a large enterprise-focused event, you might prioritize tags like company size, timeline, and pain points.
- At a startup-oriented event, you could focus on tags like authority, demo set?, and budget.
With this flexibility, your reps will see only the tags that matter for the event they’re attending, streamlining their workflow and improving data quality.
Here's how you can get started:
- Navigate to the "Lead Settings" tab in the Hub.
-
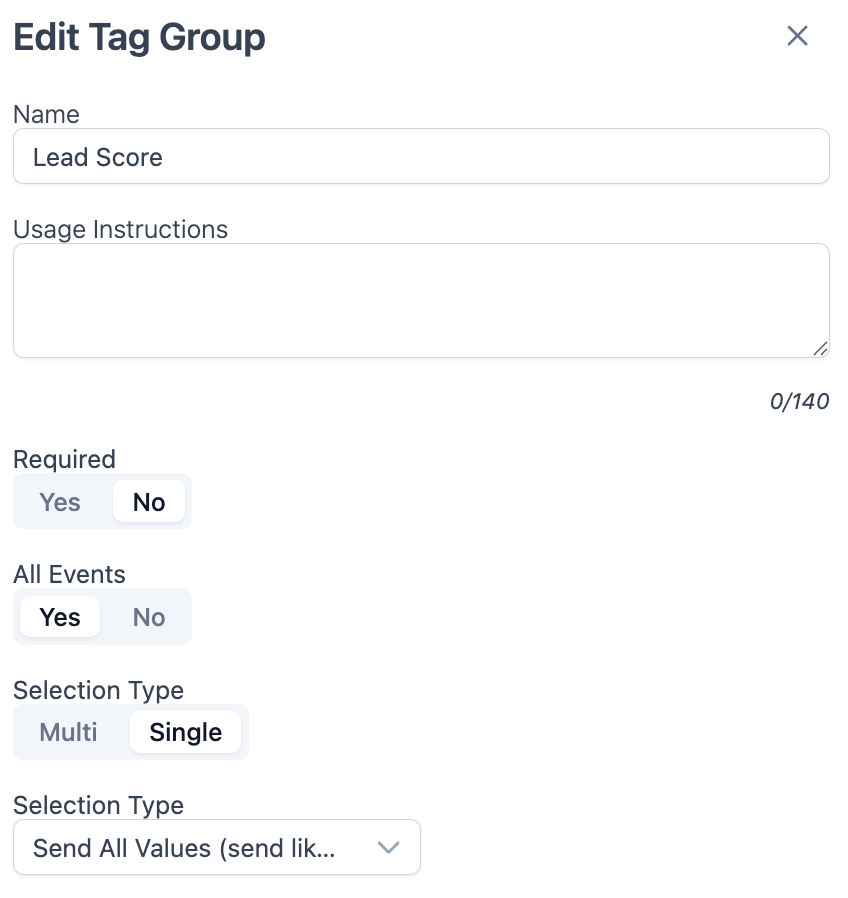
Click the edit icon on your tag group. Decide whether you'd like the tag to be visible for all events or only some events by toggling the on/off button. If you choose "Yes", the tag will be visible in the app no matter the event you're attending. If you choose "No", you'll have the option to make this tag visible on an event-by-event basis.
- Navigate to the event you want to set up.
-
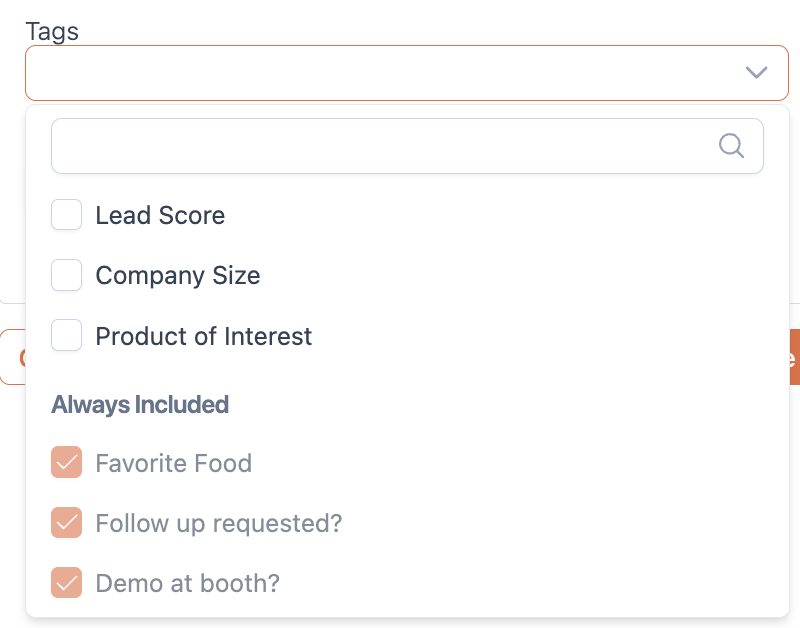
Click into the tags field. You will see all of your "Always Included" events checked by default. You will also see the option to see the other tags not marked as "Always On". You can choose too add these tags to your event.
- Any tags that you select will show up for the reps in the app when they scan a lead.

